

Replacing the strings on a classical guitar, while seemingly intricate, is quite straightforward. Although it might appear intimidating initially, there’s no need for concern. We’ll delineate the procedure clearly, enabling you to fit a new set of strings onto your guitar swiftly.
(Note that these guidelines pertain to a 6-hole tieblock. If you possess a 12-hole tieblock, additional precautions in tying the strings at the bridge are necessary.)

Essentials Required
To begin, once you’ve acquired a new set of strings (with recommendations for brands provided below), you’ll need a suitable workspace and a few tools. A table or desk is ideal, allowing the guitar to lie flat and eliminating the need to maneuver it in your lap. Helpful tools include:
- Neck-up tool: Supports the underside of the guitar’s neck, permitting free rotation of the tuning pegs while the guitar remains flat on your workspace.
- String winder: Facilitates quick turning of the tuning pegs, especially useful for removing old strings.
- Protective materials: These can be placed around or behind the bridge to prevent damage if a string comes undone. A piece of thick card stock cut to fit around your bridge should suffice.
You may also find it beneficial to use shelf liner under the guitar body to prevent it from shifting during the process.
Step 1: Removing Old Treble Strings
First, detach your old strings. Various methods exist, and some luthiers advise changing one string at a time to maintain tension on the neck, suggesting that removing all strings simultaneously can stress the neck. Others argue that the stress is minimal. Consult your luthier for their recommendation. My approach is to remove all treble strings first, then proceed to the bass strings.
- Hand-tune the 1st E string to lower the pitch.
- Use a string winder to continue releasing tension until the string is completely slack.
- Remove the string from both the headstock slot and the bridge, being careful not to scratch the guitar’s top if you lack protective material at the bridge.
- Repeat for the 2nd B and 3rd G strings.
Learn Guitar For Beginners

Step 2: Installing New Treble Strings
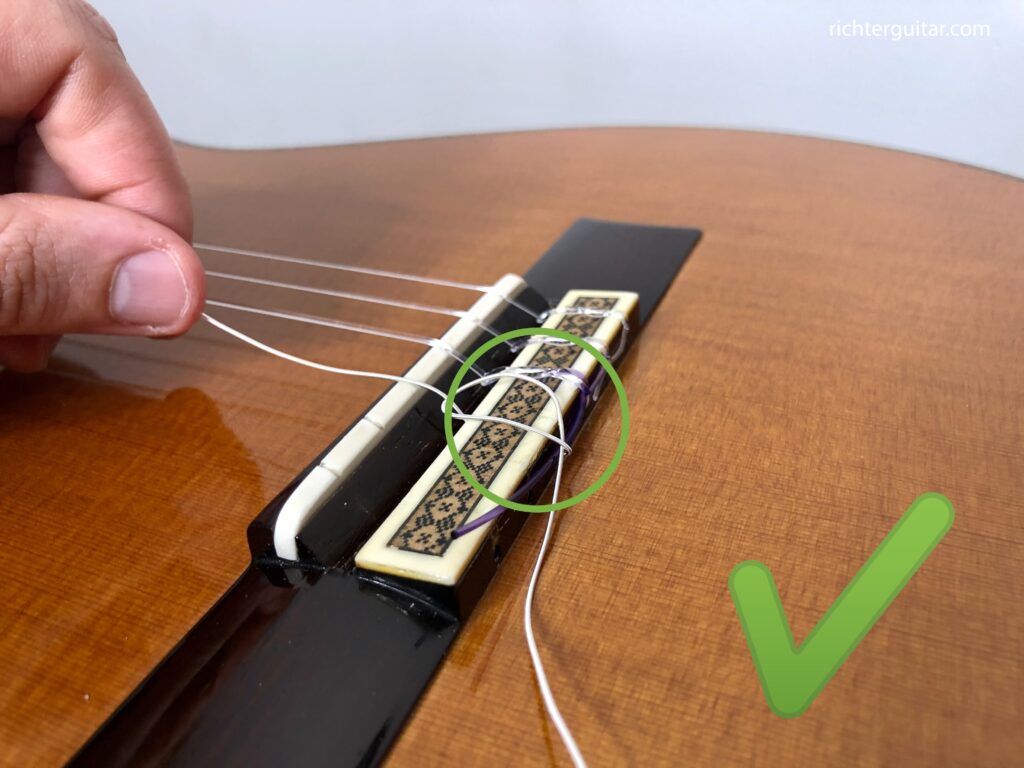
At the Bridge:
- Insert one end of the new 1st E string into the corresponding hole in the bridge, leaving enough extra string to wrap around itself 2-3 times.
- Wrap the tail end of the string around itself in a figure-8 pattern so that the wraps lie flat on the bridge and the tail is secured on the back side of the bridge.
- Place a finger on top of the wraps and pull the string taut with the other hand, ensuring the wraps are tight.
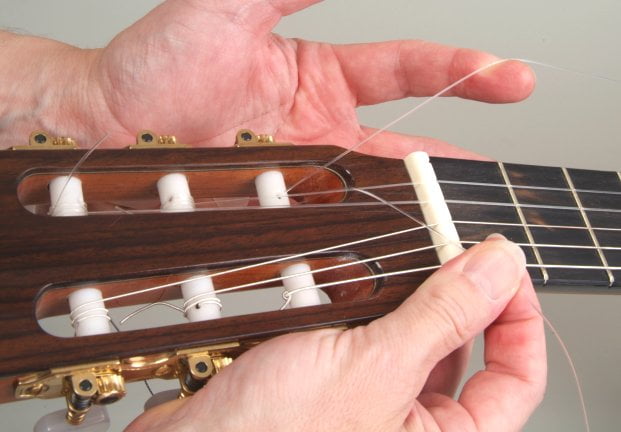
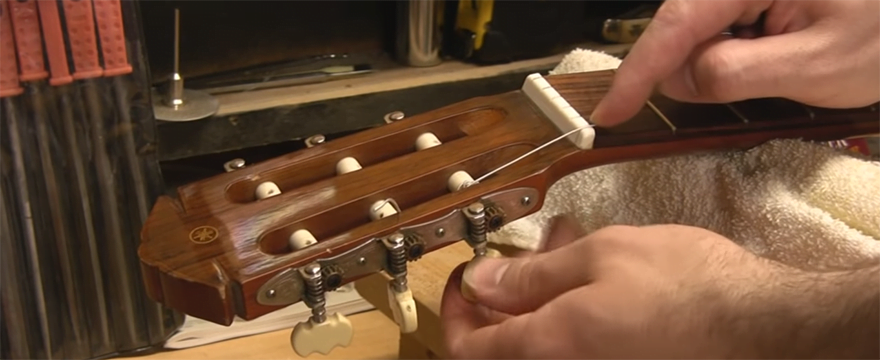
At the Headstock:
- Insert the other end of the string into the headstock slot for the first string and pull until taut, just removing slack.
- Wrap the string around itself 2-3 times, ensuring the tail points in the opposite direction of the wraps. For the 1st E string, the tail should point toward the inside of the headstock; for the 2nd and 3rd strings, the tail should point outward.
- Tune each string to pitch, noting that strings will need frequent tuning over the next few days as they settle.
Step 3: Removing Old Bass Strings
Use the same method as for the treble strings: hand unwind a few turns to ensure correct loosening direction, then use a string winder to fully remove the string.
Step 4: Installing New Bass Strings
At the Bridge:
- The procedure is similar to the trebles, with fewer wraps needed due to the windings on bass strings. Usually, one wrap is sufficient.
- Ensure the tail of the string is placed on the back side of the bridge.

At the Headstock:
- Pull the string through the headstock barrel hole and pull taut.
- Wrap the string around itself 1-2 times, ensuring the tail points opposite the wraps. The 6th E string’s tail should point inward; the 5th and 4th strings’ tails should point outward.
- Tune each string to pitch.
Step 5: Trimming Excess Strings
For a neat appearance, use fingernail clippers or a string winder with a built-in clipper to trim the string tails at both the headstock and bridge. Avoid cutting too close; leave a few millimeters at the headstock and trim the bridge tails close enough that they don’t rest on the guitar’s top.

Conclusion
Congratulations on successfully changing your classical guitar strings! Remember to regularly tune the guitar over the next few days as the strings settle. Opening the guitar case every hour or two to retune can help stabilize the pitch quickly. Soon, your guitar will maintain pitch with a fresh-sounding set of strings, ready for your next performance.
String Recommendations
For a balance of performance and value, D’Addario Pro Arte EJ45 (normal tension) or EJ46 (high tension) strings are recommended. High-tension strings provide more resistance, which might be challenging for beginners, so normal tension is advised for those new to playing. D’Addario strings are not only affordable and high-quality but also contribute greatly to the musical community.


Leave a Comment